
A product design brief gives your designer a clear problem to solve, the constraints that matter, and a way to judge the result. It helps turn an early idea into a project that can be scoped, quoted, and developed with fewer avoidable changes.
You do not need a finished specification before speaking with a design partner. You do need to distinguish what you know, what you assume, and what still needs to be investigated. This guide explains what to include and provides a practical template for your next physical product project.
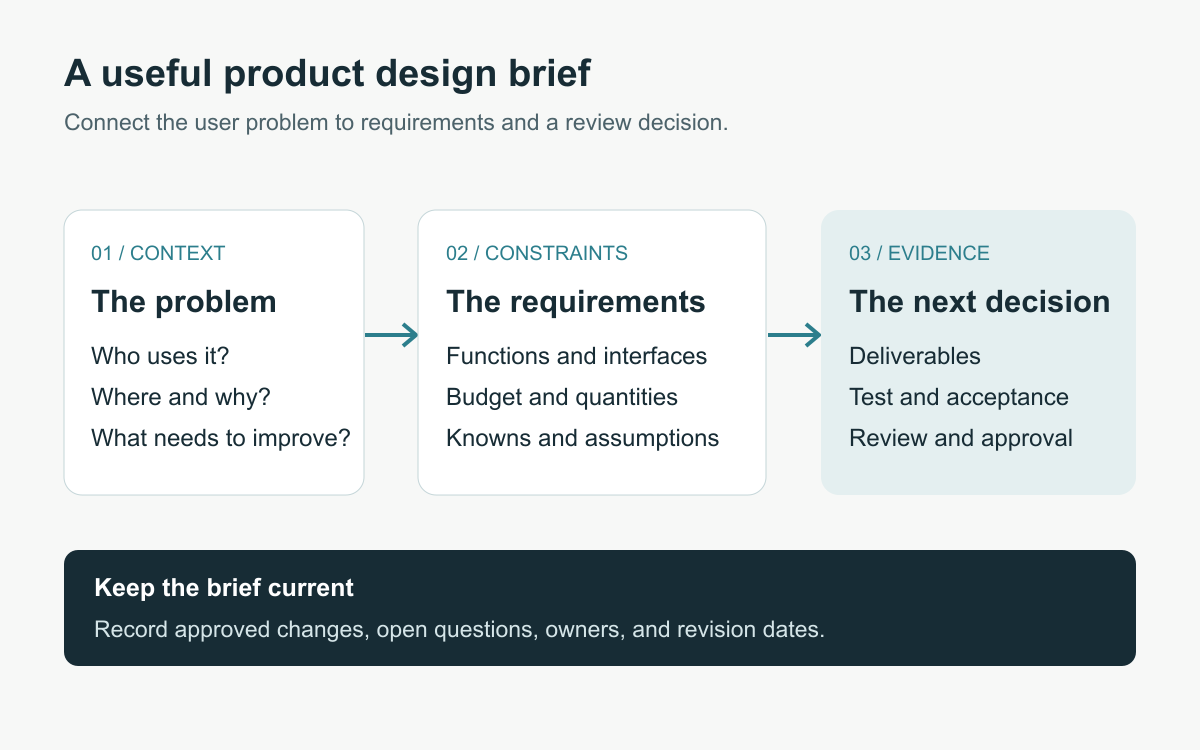
Writing a product design brief: start with the user
Describe the situation in which someone needs your product. Who are they? What are they trying to do? What makes the current solution frustrating? A description such as “a compact desk device” leaves the designer guessing. A description such as “a timer that a remote worker can set without opening a phone app” gives the project a useful direction.
Include the setting, frequency of use, and any relevant physical limitations. A control used occasionally on a desk creates different questions from one operated repeatedly while standing or wearing gloves.
Separate requirements from ideas
List the outcomes the product must achieve before specifying exactly how to achieve them. “The battery must be replaceable using a common hand tool” describes a requirement. “Use four screws on the bottom” describes one possible solution.
Both can belong in a brief, but label them clearly. Otherwise, an early sketch can accidentally become a fixed engineering constraint. Mark each item as essential, preferred, or open for exploration, and explain the reason behind essential requirements.
Record the physical and technical constraints
For a connected device, share the current PCB files, component dimensions, connector locations, battery information, and any antenna guidance from the electronics team. For a mechanical product, share loads, travel, mounting interfaces, and the components that must be retained.
Identify the maturity of each input. A placeholder battery model should not be treated as a purchased component with confirmed dimensions. Add revision dates and a named owner for technical decisions so the designer knows whom to ask when information conflicts.
Our IoT enclosure design guide explains the packaging questions that often need answers before enclosure detailing.
Explain the business constraints
Include the intended sales channel, approximate selling price, target manufacturing cost, first batch quantity, and longer term production expectations. Label unconfirmed numbers as targets. These inputs help the team discuss whether a proposed material, finish, assembly method, or tooling investment fits the product plan.
Also state the development budget and the decision it must fund. A budget for concept exploration should lead to a different scope from a budget intended to cover detailed CAD, several prototype rounds, and supplier support. Our industrial product design cost guide describes the main scope drivers.
Define deliverables and review milestones
“Complete product design” is difficult to compare between proposals. Ask for specific outputs such as concept directions, an approved component layout, editable CAD, presentation renders, prototype files, technical drawings, or manufacturing review support.
For each phase, define the review question. A concept review might approve the user interaction and overall proportions. A prototype review might approve a tested fit or mechanism. A production release review needs a different level of evidence. Make room for changes revealed by testing before committing the next phase.
A product design brief template you can copy
- Product and purpose: What are we developing, and what problem should it solve?
- Target users: Who uses it, where, and under what conditions?
- Success criteria: What must a user be able to do, and how will we evaluate it?
- Essential requirements: Which functions, dimensions, interfaces, and constraints are fixed, and why?
- Open questions: Which assumptions need research, calculations, or a prototype?
- Existing inputs: Which sketches, CAD files, components, tests, and reference products are available?
- Commercial targets: What are the budget, target cost, quantity, and intended sales channel?
- Design direction: Which references illustrate the intended experience, and what specifically is useful about each?
- Deliverables: What files, prototypes, documentation, and supplier support are required?
- Schedule and approvals: What is the next milestone, who approves it, and which dates are fixed?
Keep the brief useful as the project develops
Review the brief at major decisions. Record approved changes, unresolved questions, and the consequences for scope or schedule. A short document that stays current is more useful than a detailed specification that everyone stops reading.
If you are starting with sketches, a technical prototype, or an existing product that needs improvement, send your current material to Obi Designs. We can help define the next development stage and the deliverables needed to reach it. Explore our commercial product design case studies to see the kinds of physical products we work on.
No Comments
There are not comments on this post yet. Be the first one!